Want to give your kids an exciting outdoor activity that’s also eco-friendly? Building a tire swing is a great way to do both!
With millions of old tires cluttering landfills, why not repurpose one into a timeless backyard attraction that will entertain your kids and their friends for hours? It’s a win for both your family and the planet.
Sure, setting up a tire swing might seem like a no-brainer. While it’s not the most challenging project, many people must install them correctly. But with the proper technique, your tire swing can last for years and keep your tree healthy. Follow along, and we’ll show you how to make a tire swing like a pro!
Why a Tire Swing?

Why build a tire swing, you ask? It’s a fun and nostalgic outdoor activity for kids and adults. It promotes outdoor play, encourages creativity, and gets everyone off their screens and into the fresh air. It’s an affordable DIY project that can be assembled with basic materials you might already have at home.
Tools and Materials You’ll Need
- Tools:
- Drill with a ½-inch bit
- Ladder
- Eye protection
- Measuring tape
- Scrub brush
- Adjustable wrenches
- Pruning saw (optional)
- Materials:
- An old tire
- Heavy-duty towing strap with looped ends
- ¼-inch galvanized chain (long enough to reach from the branch to the swing)
- Threaded chain links (for attaching the tire to the chain)
- Three eye bolts (½-inch diameter, 6-inches long)
- Nuts and washers
- Rope (optional)
Step 1: Choosing the Right Tire

Tire Size and Type
First things first: choosing the right tire. You want to ensure it’s big enough to sit on but not so big that it overwhelms the swing’s structure. Typically, a car or truck tire works best. Just ensure it’s still in good condition without cracks or deep wear.
Condition of the Tire
Once you’ve picked your tire, check for cracks, wear, or sharp edges to ensure it’s safe. Then, clean it thoroughly to remove dirt, grease, or anything else that could make it uncomfortable to sit on.
Step 2: Deciding on the Swing Design
Types of Tire Swings
Next, decide whether you want a vertical or horizontal tire swing. A vertical tire swing (with a single rope going through the center) spins quickly and gives riders more freedom of movement. On the other hand, a horizontal swing (with ropes or chains attached to multiple points) provides a stable, flat surface for sitting or lying down.
Single-Rope vs. Multi-Rope Swings
When hanging the swing, you can use a single rope for a vertical design or multiple ropes for a horizontal design. Multiple ropes give more stability, especially for larger tires or swings that numerous people use simultaneously. Safety first!
Step 3: Finding the Perfect Tree
Choosing a Strong, Sturdy Tree
Now, let’s talk trees. Only some trees will do. You’ll want a sturdy, mature tree, preferably oak or maple. These trees have strong branches that can easily support the weight of a tire swing.
Branch Height and Thickness
Choose a branch at least 8 inches in diameter and about 10 to 15 feet off the ground. The branch should be healthy, without cracks or signs of rot. It ensures the swing will be safe and stable for all users.
Step 4: Safety Considerations Before Installation

Weight Limits for the Swing
Before attaching the swing, ensure you know the weight limits. The swing should be able to hold at least 200 pounds, even if it’s primarily kids using it. You want to take your time with safety here.
Swing Clearance and Space
Leave enough space around the swing to avoid accidents. Clear a space of at least 6 feet around the swing so there’s plenty of room to swing without running into fences or trees.
Step 5: Preparing the Tire
Cleaning and Drilling Drainage Holes
Before attaching the tire, clean it thoroughly. Then, use a drill to make several drainage holes in the bottom. It keeps water from pooling inside the tire, which can make the swing heavier and less comfortable.
Sanding Down Rough Edges
If the tire has sharp or rough edges, sand them down for safety. You don’t want anyone to get scratched while enjoying the swing.
Step 6: Selecting the Right Rope or Chain

Types of Rope
When selecting rope, go for something solid and durable, like nylon or polyester. These materials can withstand weather changes and won’t break easily. Cotton or other natural ropes tend to wear out faster, so avoid those if possible.
Using Chains Instead of Rope
If you prefer, you can use chains instead of rope. Chains are sturdy but may rust over time, so be prepared for some maintenance. Remember that they’re also less comfortable for kids to hold onto.
Step 7: Measuring and Cutting the Rope

Calculating Rope Length
To determine how much rope you’ll need, measure the distance from the tree branch to where you want the swing to hang, then add about five extra feet to account for knots and adjustments.
Cutting and Sealing the Rope Ends
Once you’ve cut the rope to the right length, use a lighter or matches to seal the ends to prevent fraying. This step helps extend the life of your rope and keeps it looking neat.
Step 8: Attaching the Rope or Chain to the Tire
Methods for Vertical Tire Swings
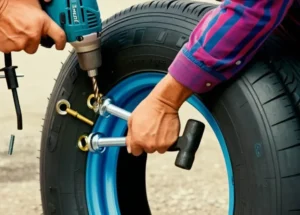
For a vertical tire swing, thread the rope through the center of the tire and tie a firm knot at the bottom. A bowline knot works well for this. Make sure the knot is tight and won’t come loose during use.
Methods for Horizontal Tire Swings
Attach the ropes or chains to evenly spaced points around the tire for a horizontal swing. It keeps the swing balanced and stable while in use.
Step 9: Securing the Swing to the Tree

Attaching the Rope to the Tree Branch
When securing the swing to the tree, loop the rope over the branch and tie it securely with a strong knot. For extra safety, use a swing kit or carabiner. Make sure the attachment is strong enough to handle the swing’s weight.
Ensuring Proper Knot Tying
Tying the correct knot is crucial. A bowline knot is an excellent option because it’s strong and won’t slip. Double-check all knots before letting anyone use the swing.
Step 10: Adjusting the Swing’s Height
Optimal Height for Different Age Groups
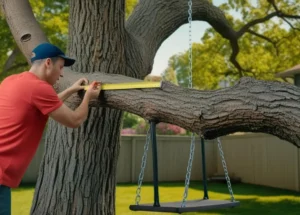
The height of the swing should be around 12 inches off the ground for small children and around 18-24 inches for older kids or adults. Test the swing before finalizing the height to make sure it’s comfortable for everyone.
Testing the Swing Before Use
Before anyone hops on, give the swing a few test pushes. Make sure everything feels secure, and the swing moves smoothly. If anything feels off, adjust the height or knots before use.
Step 11: Adding Extra Features
Padding and Comfort
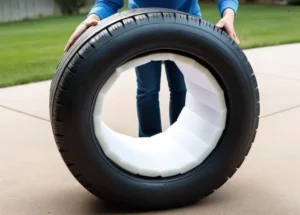
For added comfort, you can line the inside of the tire with foam or a cushion. This is especially helpful for horizontal swings, where kids might lie inside the tire.
Swivel Hooks for 360-degree Spins
If you want to add an extra layer of fun, consider installing a swivel hook at the top of the swing. This will allow the swing to spin 360 degrees, giving riders more freedom and excitement.
Step 12: Maintenance and Care of Your Tire Swing

Regular Inspections
Check the swing every few months for wear and tear. Look for fraying ropes, rust on chains, or cracks in the tire. Regular maintenance will keep your swing safe for years to come.
Protecting the Swing from Weather
Remove your tire swing during lousy weather, or cover it with a tarp to protect it from the elements. It will help extend the life of the swing and keep it looking new for longer.
Step 13: Tire Swing Safety Tips for Children

Supervision and Rules
It’s always a good idea to supervise kids while they’re on the swing. Set some basic rules, like no jumping off the swing and always holding on with both hands. Safety should always be the top priority.
Safe Swinging Practices
Teach kids to swing in a straight line and avoid twisting the ropes. This helps prevent accidents and keeps the swing in good condition.

